
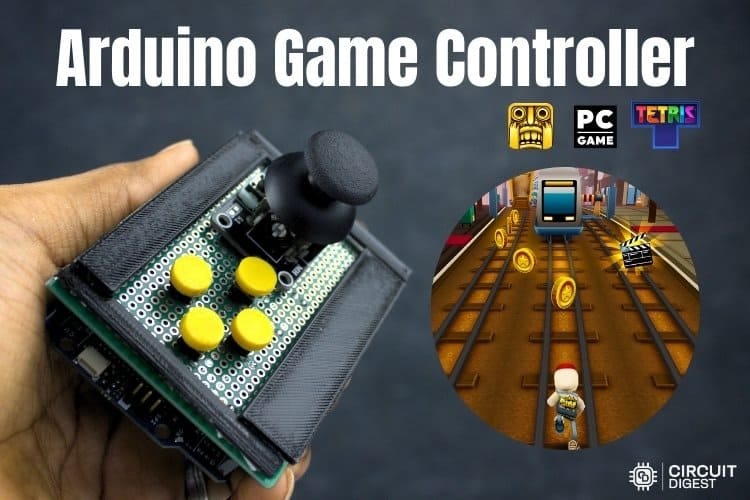
Build a DIY Arduino Game Controller for PC Gaming
Turn an Arduino Uno R4, joystick, and four buttons into a USB game controller that works with almost any PC game.

Build a DIY Arduino Game Controller for PC Gaming
Classic game controllers are simple, responsive, and incredibly satisfying to use. With an Arduino Uno R4, a joystick module, and a few push buttons, you can build your own USB game controller that your computer recognizes as a keyboard.
This project is ideal for students, makers, and gaming enthusiasts who want to learn about USB Human Interface Devices (HID) while creating a practical controller for retro and indie games.
Why Build Your Own Game Controller?
Creating a custom controller is a fun way to combine electronics and gaming. It also helps you understand:
USB HID communication
Analog input processing
Button debouncing
Keyboard emulation
Arduino programming
Because the Arduino acts like a USB keyboard, the controller works with most PC games that support keyboard input.
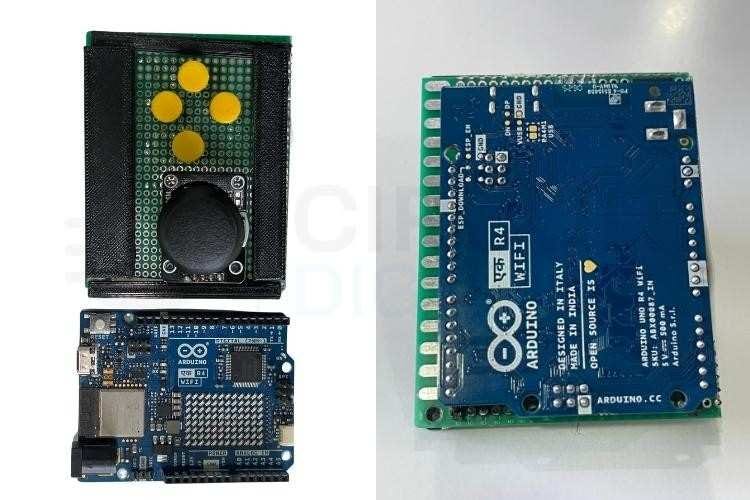
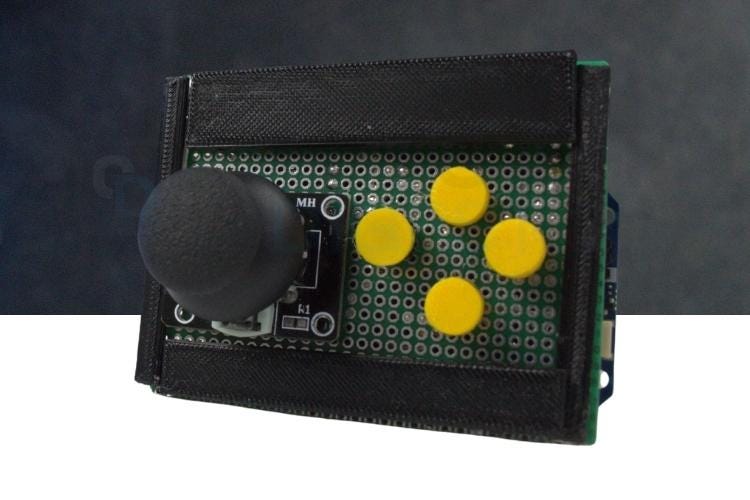
Components Required
To build this controller, you will need:
Arduino Uno R4
1 analog joystick module
4 tactile push buttons
Veroboard or breadboard
Jumper wires
USB cable
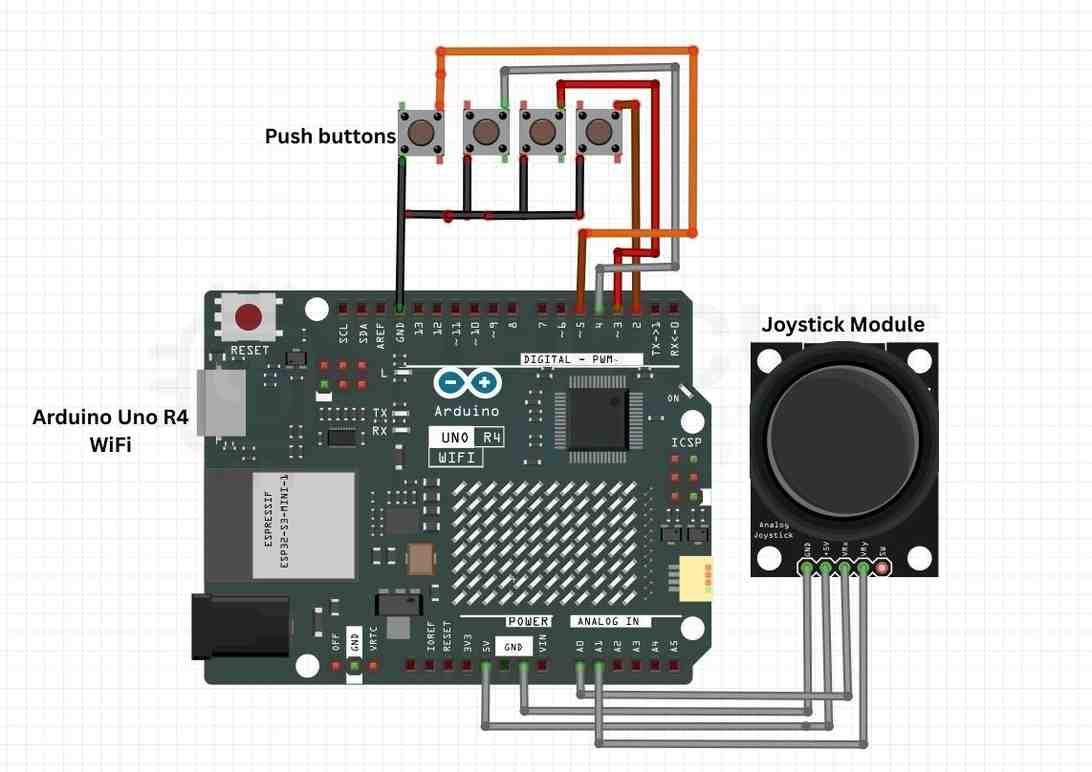
How It Works
The Arduino continuously reads:
The joystick’s X and Y analog values
The state of the four buttons
When the joystick moves beyond preset threshold values, the Arduino sends arrow key presses to the computer.
Button presses send the W, A, S, and D keys, which are commonly used in many games.
Since the board identifies as a keyboard, no special drivers are required.
Example Arduino Code
#include <Keyboard.h>

const int joyX = A0;
const int joyY = A1;
const int buttonPins[4] = {2, 3, 4, 5};
const char buttonKeys[4] = {'w', 'a', 's', 'd'};

const int LOW_TH = 350;
const int HIGH_TH = 670;

void setup() {
  for (int i = 0; i < 4; i++) {
    pinMode(buttonPins[i], INPUT_PULLUP);
  }

  delay(3000);   // Allow USB detection
  Keyboard.begin();
}

void loop() {
  int x = analogRead(joyX);
  int y = analogRead(joyY);

  if (x < LOW_TH) Keyboard.press(KEY_LEFT_ARROW);
  else Keyboard.release(KEY_LEFT_ARROW);

  if (x > HIGH_TH) Keyboard.press(KEY_RIGHT_ARROW);
  else Keyboard.release(KEY_RIGHT_ARROW);

  if (y < LOW_TH) Keyboard.press(KEY_UP_ARROW);
  else Keyboard.release(KEY_UP_ARROW);

  if (y > HIGH_TH) Keyboard.press(KEY_DOWN_ARROW);
  else Keyboard.release(KEY_DOWN_ARROW);

  for (int i = 0; i < 4; i++) {
    if (digitalRead(buttonPins[i]) == LOW)
      Keyboard.press(buttonKeys[i]);
    else
      Keyboard.release(buttonKeys[i]);
  }

  delay(10);
}
Understanding the Dead Zone
Analog joysticks rarely return perfectly centered values. To avoid accidental movement, the code uses threshold values:
Below 350 → low direction
Above 670 → high direction
Between 350 and 670 → neutral zone
Adjust these numbers if your joystick drifts.
Uploading the Code
Install the Arduino IDE.
Select Arduino Uno R4 from the board menu.
Paste the code.
Upload the sketch.
Connect the board to your PC.
After a short delay, the controller is ready to use.
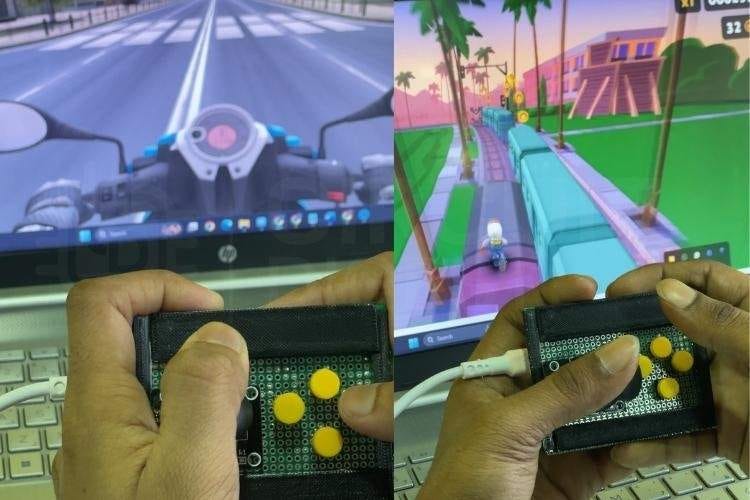
Best Games to Test
This controller works well with:
Retro arcade games
Platformers
Fighting games
Puzzle games
Browser games
Any title that supports keyboard controls should be compatible.
Troubleshooting Tips
Controller Not Detected
Confirm the correct board is selected.
Use a data-capable USB cable.
Keep the 3-second startup delay.
Joystick Drift
Increase the dead-zone thresholds.
Buttons Trigger Randomly
Verify the buttons are wired to GND.
Ensure
INPUT_PULLUPis enabled.
Keys Stay Pressed
Check for loose connections.
Re-upload the code.

Possible Upgrades
You can extend this project with:
RGB LED indicators
Wireless connectivity
Rechargeable battery
3D-printed enclosure
Additional buttons
What You Learn
By completing this project, you gain experience with:
Reading analog and digital inputs
USB keyboard emulation
Game controller design
Real-time input handling
Final Thoughts
Building a custom Arduino game controller is a rewarding project that blends nostalgia, electronics, and coding. With just a few components, you can create a reliable USB controller for your favorite PC games while learning valuable embedded programming skills.
Whether you are an electronics student or a hobbyist, this project is a great introduction to human interface devices and interactive hardware design. Explore hands-on electronics tutorials and creative builds in the Arduino Projects collection on CircuitDigest