
Arduino Automatic Toll Gate System — Smart Contactless Design
Build a smart automated toll gate using Arduino, RFID cards, IR sensors & servo control — learn how vehicle detection, balance validation & gate automation work.

Arduino-Based Automatic Toll Gate System — A Complete DIY Guide
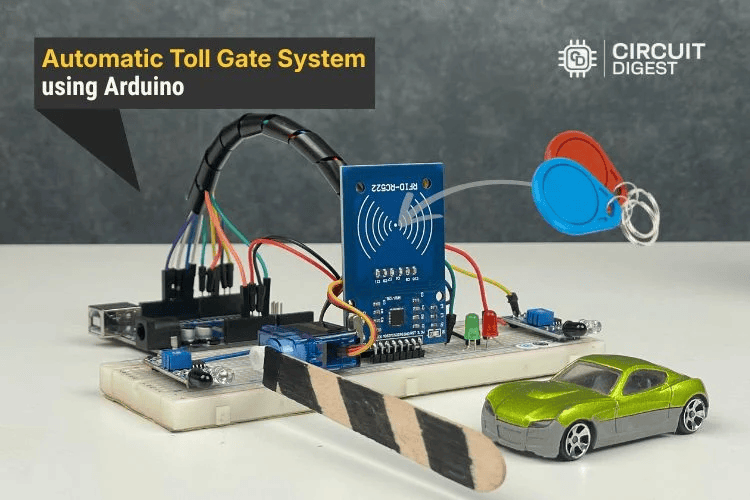
Automating everyday infrastructure not only brings convenience but also introduces learners to real-world electronics and programming concepts. In this project, we will explore how to build an automatic toll gate system using an Arduino microcontroller, RFID cards for contactless payment, infrared sensors for vehicle detection, and a servo motor for gate control. This setup eliminates manual toll collection, making vehicle throughput smoother and hands-free — perfect for school students, hobbyists, and tech enthusiasts alike.
Why This Project Matters
Traditional toll booths often cause delays and require human operators to collect cash or tickets. With automation:
Vehicles are detected automatically,
Payments are processed via RFID cards,
Gates open only for valid, funded users,
The entire system runs without manual intervention.
This project demonstrates how basic components and simple code can replicate a process used in real highways and smart parking systems.
How It Works — Step by Step
1. Vehicle Detection
The first IR sensor senses when a vehicle arrives at the toll entrance. Once triggered, the system moves into authentication mode.
2. RFID Authentication
Drivers present an RFID card to the RC522 reader. The Arduino reads the card’s unique ID and compares it against stored IDs with associated balances.
3. Payment Validation
Once an RFID UID is matched:
If the stored balance is sufficient, the toll amount is deducted.
If insufficient, the access is denied.
If the card is unknown, it’s rejected outright.
4. Gate Control
With successful payment, the servo motor rotates to lift the gate barrier, and a green LED lights up. After the vehicle exits and triggers the second IR sensor, the gate closes and the system resets for the next vehicle.
This workflow models how automated toll systems operate on highways with minimum human oversight.
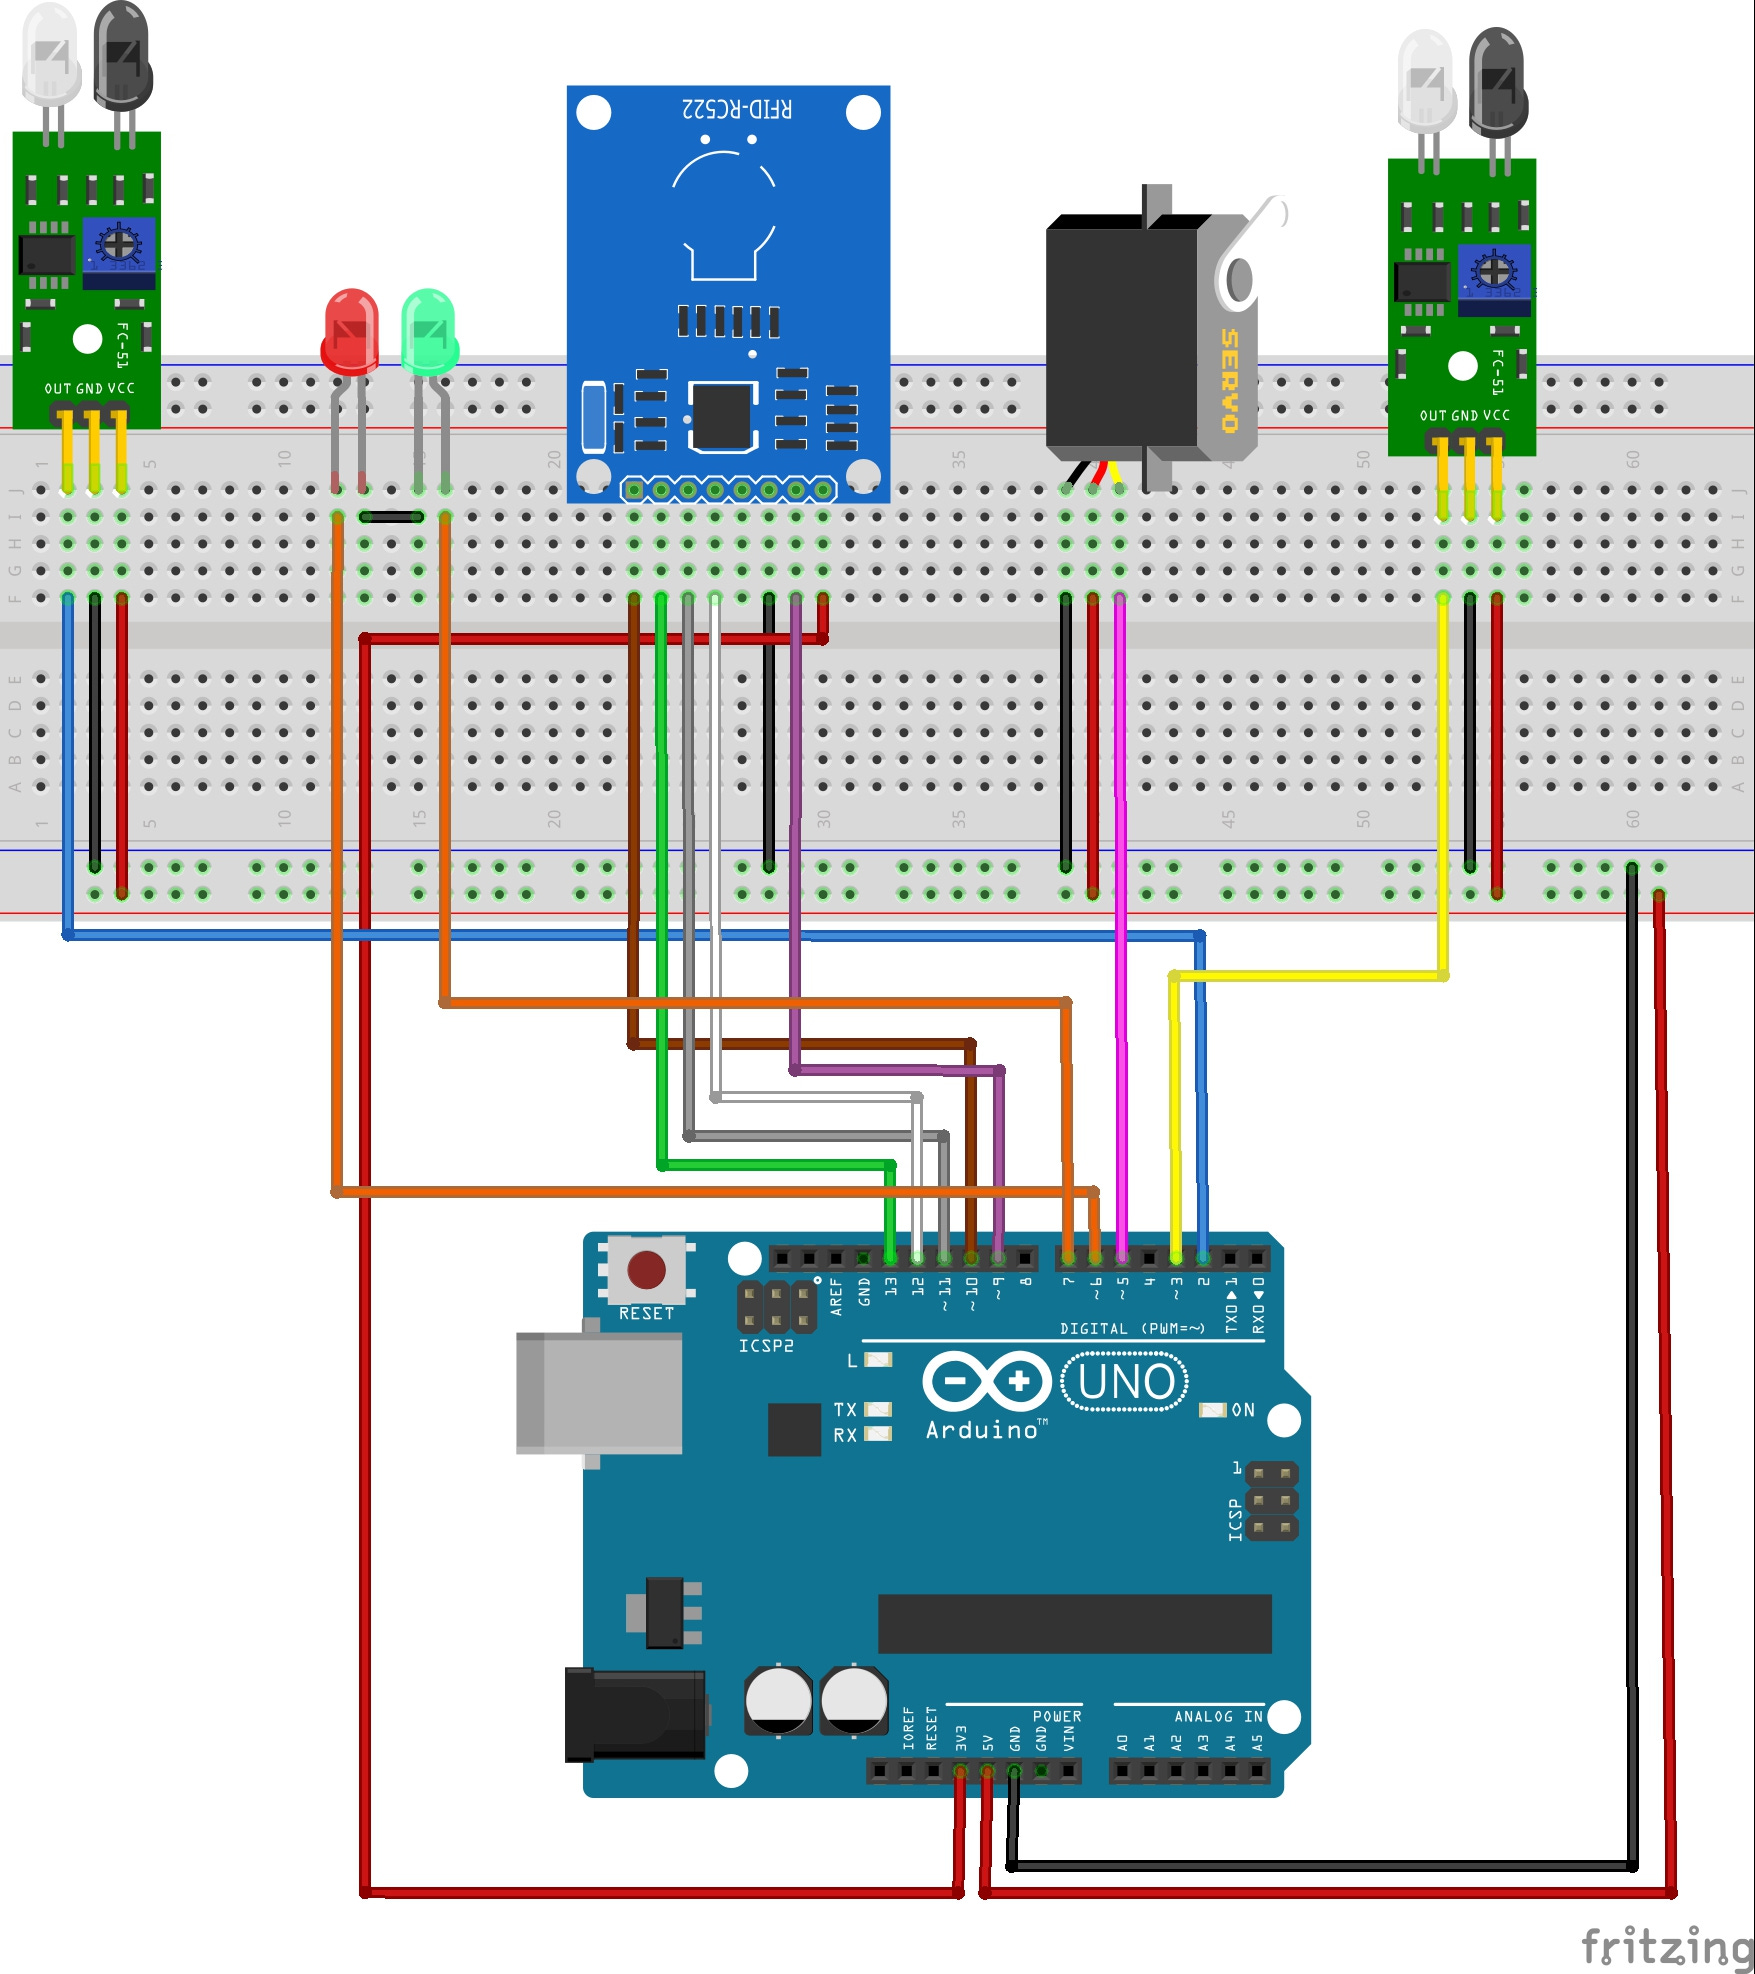
Circuit Logic & Wiring Overview
The Arduino acts as the central controller:
RFID Reader connects via SPI protocol (pins 10, 11, 12, 13),
IR Sensors feed digital signals,
Servo Motor attaches to a PWM pin to manipulate the barrier,
LEDs indicate system status.
All components share power and ground lines, with the RFID module running at 3.3 V and other devices at 5 V.
Sample Code Insights
The code powering this project integrates several key libraries:
#include <SPI.h>
#include <MFRC522.h>
#include <Servo.h>
These libraries let the Arduino:
Communicate with the RFID reader,
Control the servo motor,
Run logic loops to check sensors and balance.
The program continuously watches for vehicle entry, reads RFID cards, compares IDs to known values, deducts toll charges, and moves the gate accordingly.
Testing & Output Feedback
Using the Arduino Serial Monitor, you’ll see real-time logs:
Detection of vehicles,
RFID readouts,
Balance verification,
Gate actions.
This feedback is crucial during testing and debugging to confirm that the system behaves as expected.
Applications Beyond Toll Gates
This automated system is a practical demonstration of how RFID + microcontrollers can be used in:
Highway toll plazas,
Parking management at malls or airports,
Gated communities,
Industrial access control systems.
By expanding the logic and adding displays or network connectivity, such systems can be adapted for smart city infrastructure.
Troubleshooting Tips
Common issues that may arise include:
RFID reader not detecting cards: Check voltage and wiring.
Servo not opening: Ensure proper power supply.
IR sensors oscillating falsely: Adjust positioning and avoid direct light interference.
Simple adjustments and verifying connections usually fix most hardware issues.
Future Enhancements
Here are ideas to take this setup to the next level:
Add an LCD display to show balances and messages.
Introduce Wi-Fi connectivity for cloud logging and balance updates.
Use mobile apps to check balances.
Implement OCR license plate recognition.
Add solar power backup for outdoor deployments.
These enhancements make the system more robust and scalable for real-world use.
Conclusion
The Automatic Toll Gate System Project Using Arduino is a powerful project that combines hardware, sensors, code, and automation to solve a practical problem. Whether you’re a beginner eager to learn or a hobbyist looking for your next build, this project is engaging, instructive, and highly customizable.